1.-Know the Halasana
1.1.-Etymology
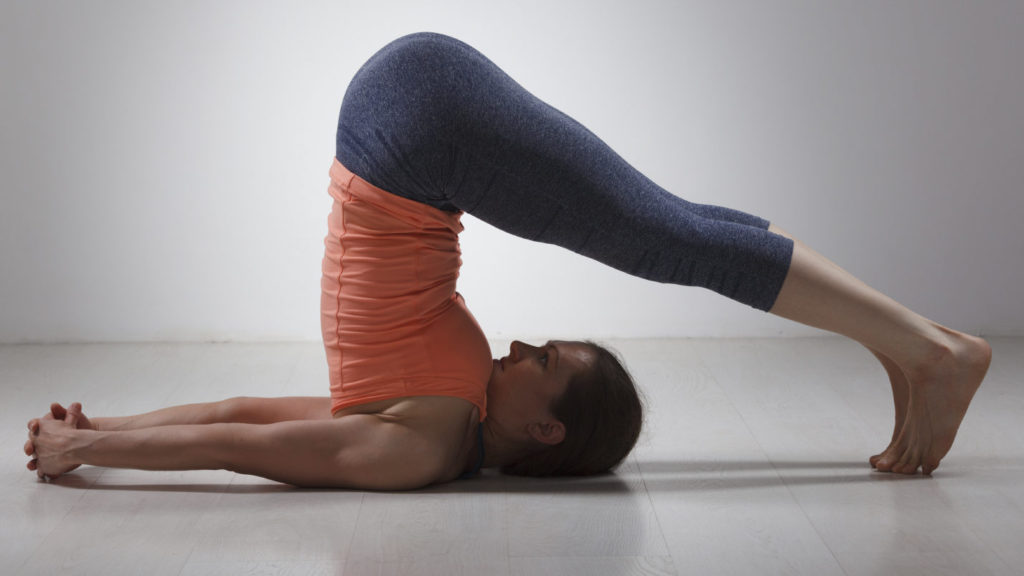
Halasana comes from the Sanskrit ‘HALA‘, which means ‘plow‘; and ‘ASANA‘ which means ‘posture‘. Therefore, the translation of Halasana is ‘the position of the plow’.
Metaphorically, Halasana represents for yogis the plow that purifies the mental level of their being.
1.2.-Caution
Halasana can cause discomfort if not practiced with guidance. Certainly, a general awareness of the body is needed during the practice of any yoga posture or asana. However, if one does not have any of the above problems and yet finds it difficult to adopt this pose or stay comfortably in this pose, work on the body should be done under the guidance of an expert in the field of yoga practice. .
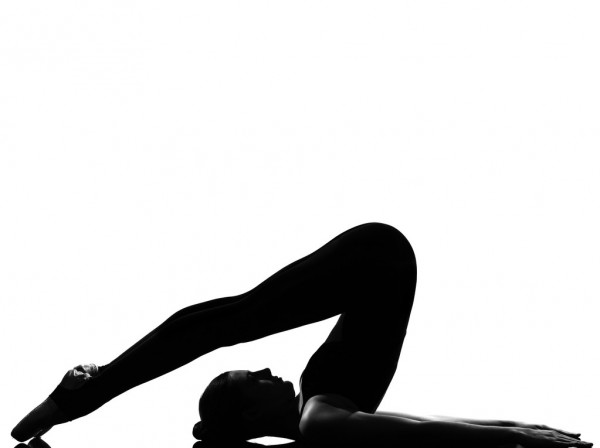
If you suffer from any of the following things, YOU SHOULD AVOID THE PRACTICE OF THIS ASANA:
Back problems or disc slippage; weak or injured cervical muscles; weak legs, weak hamstrings or calf muscles; you are a pregnant woman or you are menstruating; suffer from enlarged thyroid, spleen and liver; weak blood vessels in the eyes; severe headaches like migraines; hypertension; sciatica or weak digestion problems.
Sometimes the above problems can also be fixed or overcome with slow practice of other asanas. If you gain confidence, you can start doing Halasana for maximum benefit.
2.-How to do the Halasana
Step 1
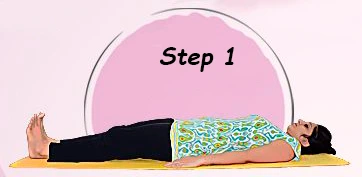
To start with this asana, start by lying on the floor with your feet together and your arms relaxed and close to your body. Stay here with few breaths and relax the body.
Step 2
Second, with a deep breath, lift both feet up to 90 degrees and exhale. With both hands, hold your toes and lift your head and begin to take a slow breath to prepare your back and neck for Main Pose.
As you exhale, reach further into your toes and bring your head or forehead closer to your knees or legs and feel the stretch in your neck and shoulders.
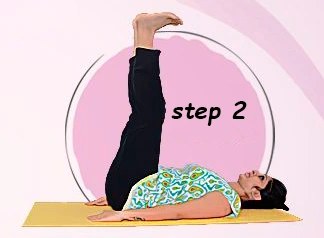
This pose is essential before getting to the main Halasana. This gets the neck and shoulder muscles ready for the pose, as a lot of stress will be felt when the whole body is in Halasana.
Slowly, after a few breaths, release your neck and lower your head and, supported by your hands, raise your legs, lifting your lower back off the ground.
Step 3
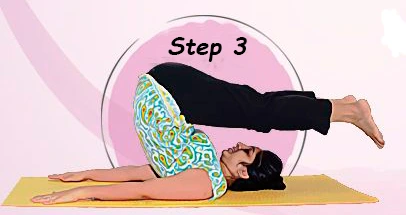
With a deep breath, take your entire lower body and bring it far behind your head trying to reach the floor with your toes. Exhale fully and relax your breath in this position. The lower body moves with the support of the wrists at the lower back and hips.
As you get comfortable, try to breathe in and move your legs further back trying not to put pressure on your neck. To enjoy this pose, one must practice keeping the neck and shoulder relaxed. This comes with practice and the slower and more rhythmic the breath, the longer you can stay in this position.
Using your arms and wrists supports your lower back to stay in position, but make sure you don’t push your back. Make sure the focus is also on your spine as you breathe and stretch.
Step 4
With a deep inhalation, lift your knees and toes off the ground and, with the support of your hands on your lower back and hips, slowly raise and lower your legs with a full exhalation. to the ground and keep your knees bent and relax. Stand with your feet on the ground with your knees bent making sure your entire spine is touching the ground and relax by taking deep breaths.
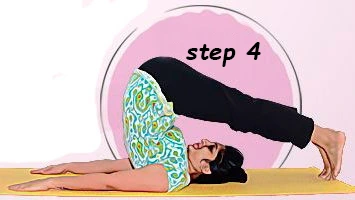
After a few breaths, continue practicing the pose and try to hold it longer with ease.
In short, this pose works well when you get the breath coordination in the pose. Make sure that while your legs are straight behind you, your knees are not bent and your toes are flat on the floor. Initially, breathing becomes difficult while in this pose as a lot of pressure goes to the chest and the windpipe is quite blocked. This slow breathing without getting stressed and choking in the chest should be guided by an experienced teacher who understands the student’s body. If the weight of the belly is greater, the heaviness in the chest will cause discomfort and make breathing less smooth. One should definitely try this pose the first few times on an empty stomach, as no form of indigestion will make it any easier.
3.- Halasana strengthens a chakra
Using Yoga to open the Chakras is a method by which we achieve inner peace and harmony. The Chakras are an element of our physical and energetic body, which we must take into account if we work on our spirituality and modulate our mind.
We will see this activation work reflected in a better physical and mental sensation, and in a better attitude towards ourselves and towards everything around us.
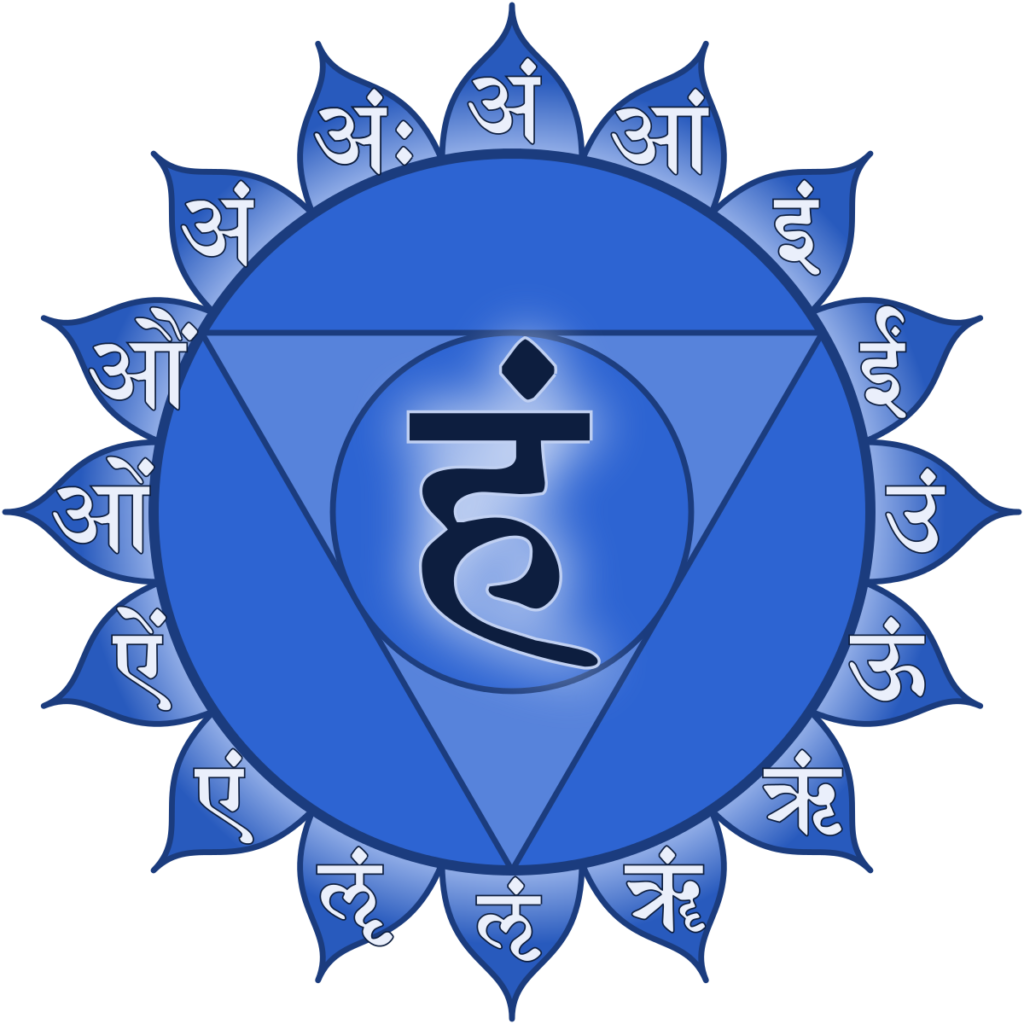
“Vishuddha Chakra is the stepping stone that allows us to get in touch with our Higher Consciousness. It enables us to live in a state of elevated experience of reality”
Enmanuel Torras Mata
The fifth Chakra is Vishuddha, associated with the color blue and the element Ether; it is the first among the higher Chakras. In Vishuddha resides the word, and from this center emanates the transparent purity and clarity, the absolute truth that comes from one’s own experience. Its opening facilitates a new dimension of reality, promoting the most important change in our lives.
4.-Beneficial effects
To begin with, this asana acts directly on the spine, which restores its health, strength and elasticity. It also prevents the vertebrae from premature ossification.
Also, it cures different forms of myalgia, lumbago, neuralgia and dislocations. In addition, it beneficially influences all vegetative life through its influence on the sympathetic ganglia as it regenerates and revitalizes due to the resonance with telluric energies.
If you are tired, do it at night for 2-3 minutes and you will see the magical effects for yourself as if the muscles of the back are tense/contracted, relaxed and then stretched, what it brings is an additional amount of blood in the trunk.
The dynamic phase of Halasana strengthens the abdominal muscles, as well as the thighs.
During actual practice, the thyroid is put under pressure and therefore also benefits from increased blood flow. By regularizing the thyroid function, the metabolism is controlled and therefore you can control your weight.
Due to the inverted position, the head benefits from improved blood flow. It is even possible for those with bare patches to get it back. Also, your face will be brighter, due to the same improved blood flow directed towards it.
The position of the body in the final phase of this asana ensures the massage of the kidney, spleen and pancreas, resulting in their decongestion and stimulation.
Pelvic pain due to the mobility of the uterus is relieved by the practice of Halasana, which also eliminates unpleasant body odours, slims the waist and eliminates obesity.
